The following cosmetics could be obtained from the Battle Pass.
Gummi Paw |
Gummi |
Lil' Gummi |
Lollipop Staff (Chancellor) |
Choco Chancellor |
Choco Cloak |
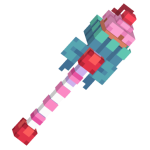 Cupcake Staff |
 Cupcake |
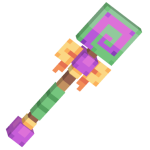 Lollipop Staff (Minty) |
Gumball Head | ||
m minor tweak to the date |
Seasons link |
||
| (10 intermediate revisions by 3 users not shown) | |||
| Line 1: | Line 1: | ||
{{Chronology|previous=[[Season 2|Neon Galaxy]]|next=}} | {{Chronology|previous=[[Season 2|Neon Galaxy]]|next=[[Season 4|Ancient Jungle]]}} | ||
'''Candy Factory''' | '''Candy Factory''' was the third [[Seasons|season]] of MCC Island, themed around candy and sweet food. It brought with it 33 seasonal cosmetics, such as [[Mellowhead (S'more'd)]] and [[Gumball Head]]. It started on December 13<sup>th</sup>, 2023 and ended on April 17<sup>th</sup>, 2024, totaling 126 days. | ||
== Battle Pass == | == Battle Pass == | ||
The [[Battle Pass]] for Season 3 | The [[Battle Pass]] for Season 3 contained 50 levels and required between 1-5 Battle Pass Points per level. The premium road could be bought for 450 {{Gem|size=16px}} or on the [https://store.mccisland.net Webstore]. | ||
Battle Pass points could be earnt by earning Faction XP. The amount of Faction XP needed for each point increased every time one was claimed (max of 7 claims a day), and reset each day. | |||
{| class="wikitable" | |||
|+ | |||
|Point | |||
|XP needed | |||
|- | |||
|1 | |||
|100 XP | |||
|- | |||
|2 | |||
|500 XP | |||
|- | |||
|3 | |||
|1,000 XP | |||
|- | |||
|4 | |||
|1,500 XP | |||
|- | |||
|5 | |||
|2,000 XP | |||
|- | |||
|6 | |||
|3,000 XP | |||
|- | |||
|7 | |||
|4,000 XP | |||
|} | |||
Once a player unlocked every level of the Battle Pass, the Bonus Meter unlocked, which rewarded players with [[Candy Factory Token]]s each time it was filled. The required Faction XP for the meter to fill increased every 50 claims. | |||
{| class="wikitable" | |||
|+ | |||
|Claims | |||
|XP needed | |||
|- | |||
|1 - 50 | |||
|500 XP | |||
|- | |||
|51 - 100 | |||
|750 XP | |||
|- | |||
|101 - 150 | |||
|1,000 XP | |||
|- | |||
|151 - 200 | |||
|1,500 XP | |||
|- | |||
|201 - 250 | |||
|2,000 XP | |||
|- | |||
|251 - 300 | |||
|2,500 XP | |||
|- | |||
|301 - 500 | |||
|3,000 XP | |||
|} | |||
The Battle Pass had the following rewards at each level: | |||
<onlyinclude> | <onlyinclude> | ||
{| class="wikitable" | {| class="wikitable mw-collapsible mw-collapsed" | ||
!Level | !Level | ||
!Battle Pass Point Cost | <noinclude> | ||
!Battle Pass Point Cost</noinclude> | |||
![[File:FreeBattlePass-Icon.png|20px]] Free Road | ![[File:FreeBattlePass-Icon.png|20px]] Free Road | ||
![[File:BattlePass-Icon.png|20px]] Premium Road | ![[File:BattlePass-Icon.png|20px]] Premium Road | ||
|- | |- | ||
|1 | |1 | ||
| rowspan="10" |1 | <noinclude> | ||
|[[File:Bronze Treasure Key.png| | | rowspan="10" |1</noinclude> | ||
|[[File:Silver Treasure Key.png| | |[[File:Bronze Treasure Key.png|75px|link=Bronze Treasure Key]] <br /> [[Bronze Treasure Key]] | ||
|[[File:Silver Treasure Key.png|75px|link=Silver Treasure Key]] <br /> [[Silver Treasure Key]] | |||
|- | |- | ||
|2 | |2 | ||
|[[File:Daily Quest Reroll Token.png| | |[[File:Daily Quest Reroll Token.png|75px|link=Daily Quest Reroll Token]] <br /> 3x [[Daily Quest Reroll Token]] | ||
|[[File:Scroll Quest Reroll Token.png| | |[[File:Scroll Quest Reroll Token.png|75px|link=Scroll Quest Reroll Token]] <br /> 3x [[Scroll Quest Reroll Token]] | ||
|- | |- | ||
|3 | |3 | ||
|[[File:Standard Crate Token.png| | |[[File:Standard Crate Token.png|75px|link=Standard Crate Token]] <br /> [[Standard Crate Token]] | ||
|[[File:Boosted Crate Token.png| | |[[File:Boosted Crate Token.png|75px|link=Boosted Crate Token]] <br /> [[Boosted Crate Token]] | ||
|- | |- | ||
|4 | |4 | ||
|[[File:Uncommon Material Quest Scroll.png| | |[[File:Uncommon Material Quest Scroll.png|75px|link=Uncommon Material Quest Scroll]] <br /> 2x [[Uncommon Material Quest Scroll]] | ||
|[[File:Rare Material Quest Scroll.png| | |[[File:Rare Material Quest Scroll.png|75px|link=Rare Material Quest Scroll]] <br /> 2x [[Rare Material Quest Scroll]] | ||
|- | |- | ||
|5 | |5 | ||
|[[File:Candy Factory Token.png| | |[[File:Candy Factory Token.png|75px|link=Candy Factory Token]] <br /> 5x [[Seasonal Shop|Candy Factory Token]] | ||
| | |{{AFix|Candy Factory Key.gif|75px|link=Candy Factory Key}} [[Seasonal Shop|Candy Factory Key]] | ||
|- | |- | ||
|6 | |6 | ||
|[[File:Medium Currency Pouch.png| | |[[File:Medium Currency Pouch.png|75px|link=Medium Currency Pouch]] <br /> 2x [[Medium Currency Pouch]] | ||
|[[File:Epic Coin Quest Scroll.png| | |[[File:Epic Coin Quest Scroll.png|75px|link=Epic Coin Quest Scroll]] <br /> 2x [[Epic Coin Quest Scroll]] | ||
|- | |- | ||
|7 | |7 | ||
|[[File:Uncommon Questing Crate.png| | |[[File:Uncommon Questing Crate.png|75px|link=Uncommon Questing Crate]] <br /> [[Questing Crate|Uncommon Questing Crate]] | ||
|[[File:Rare Questing Crate.png| | |[[File:Rare Questing Crate.png|75px|link=Rare Questing Crate]] <br /> [[Questing Crate|Rare Questing Crate]] | ||
|- | |- | ||
|8 | |8 | ||
|[[File:Standard Crate Token.png| | |[[File:Standard Crate Token.png|75px|link=Standard Crate Token]] <br /> [[Standard Crate Token]] | ||
|[[File:Candy Factory Token.png| | |[[File:Candy Factory Token.png|75px|link=Candy Factory Token]] <br /> 10x [[Seasonal Shop|Candy Factory Token]] | ||
|- | |- | ||
|9 | |9 | ||
|[[File:Uncommon Coin Quest Scroll.png| | |[[File:Uncommon Coin Quest Scroll.png|75px|link=Uncommon Coin Quest Scroll]] <br /> 2x [[Uncommon Coin Quest Scroll]] | ||
|[[File:Large Currency Pouch.png| | |[[File:Large Currency Pouch.png|75px|link=Large Currency Pouch]] <br /> 2x [[Large Currency Pouch]] | ||
|- | |- | ||
|10 | |10 | ||
|[[File:Cupcake Staff.png| | |[[File:Cupcake Staff.png|75px|link=Cupcake Staff]] <br /> [[Cupcake Staff]] | ||
| | |{{AFix|Gummi Paw.png|75px|link=Gummi Paw}} [[Gummi Paw]] | ||
|- | |- | ||
|11 | |11 | ||
| rowspan="10" |2 | <noinclude> | ||
|[[File:Bronze Treasure Key.png| | | rowspan="10" |2</noinclude> | ||
|[[File:Epic Coin Quest Scroll.png| | |[[File:Bronze Treasure Key.png|75px|link=Bronze Treasure Key]] <br /> [[Bronze Treasure Key]] | ||
|[[File:Epic Coin Quest Scroll.png|75px|link=Epic Coin Quest Scroll]] <br /> 2x [[Epic Coin Quest Scroll]] | |||
|- | |- | ||
|12 | |12 | ||
|[[File:Scroll Quest Reroll Token.png| | |[[File:Scroll Quest Reroll Token.png|75px|link=Scroll Quest Reroll Token]] <br /> 3x [[Scroll Quest Reroll Token]] | ||
|[[File:Candy Factory Token.png| | |[[File:Candy Factory Token.png|75px|link=Candy Factory Token]] <br /> 15x [[Seasonal Shop|Candy Factory Token]] | ||
|- | |- | ||
|13 | |13 | ||
|[[File:Rare Coin Quest Scroll.png| | |[[File:Rare Coin Quest Scroll.png|75px|link=Rare Coin Quest Scroll]] <br /> 2x [[Rare Coin Quest Scroll]] | ||
|[[File:Silver Treasure Key.png| | |[[File:Silver Treasure Key.png|75px|link=Silver Treasure Key]] <br /> [[Silver Treasure Key]] | ||
|- | |- | ||
|14 | |14 | ||
|[[File:Medium Currency Pouch.png| | |[[File:Medium Currency Pouch.png|75px|link=Medium Currency Pouch]] <br /> 3x [[Medium Currency Pouch]] | ||
|[[File:Boosted Crate Token.png| | |[[File:Boosted Crate Token.png|75px|link=Boosted Crate Token]] <br /> [[Boosted Crate Token]] | ||
|- | |- | ||
|15 | |15 | ||
|[[File:Candy Factory Token.png| | |[[File:Candy Factory Token.png|75px|link=Candy Factory Token]] <br /> 5x [[Seasonal Shop|Candy Factory Token]] | ||
| | |{{AFix|Gummi.png|75px|link=Gummi}} [[Gummi]] | ||
|- | |- | ||
|16 | |16 | ||
|[[File:Daily Quest Reroll Token.png| | |[[File:Daily Quest Reroll Token.png|75px|link=Daily Quest Reroll Token]] <br /> 5x [[Daily Quest Reroll Token]] | ||
|[[File:Large Currency Pouch.png| | |[[File:Large Currency Pouch.png|75px|link=Large Currency Pouch]] <br /> 3x [[Large Currency Pouch]] | ||
|- | |- | ||
|17 | |17 | ||
|[[File:Uncommon Material Crate.png| | |[[File:Uncommon Material Crate.png|75px|link=Uncommon Material Crate]] <br /> [[Material Crate|Uncommon Material Crate]] | ||
|[[File:Epic Material Quest Scroll.png| | |[[File:Epic Material Quest Scroll.png|75px|link=Epic Material Quest Scroll]] <br /> 2x [[Epic Material Quest Scroll]] | ||
|- | |- | ||
|18 | |18 | ||
|[[File:Rare Material Quest Scroll.png| | |[[File:Rare Material Quest Scroll.png|75px|link=Rare Material Quest Scroll]] <br /> 2x [[Rare Material Quest Scroll]] | ||
|[[File:Candy Factory Token.png| | |[[File:Candy Factory Token.png|75px|link=Candy Factory Token]] <br /> 15x [[Seasonal Shop|Candy Factory Token]] | ||
|- | |- | ||
|19 | |19 | ||
|[[File:Standard Crate Token.png| | |[[File:Standard Crate Token.png|75px|link=Standard Crate Token]] <br /> [[Standard Crate Token]] | ||
|[[File:Scroll Quest Reroll Token.png| | |[[File:Scroll Quest Reroll Token.png|75px|link=Scroll Quest Reroll Token]] <br /> 5x [[Scroll Quest Reroll Token]] | ||
|- | |- | ||
|20 | |20 | ||
|[[File:Cupcake.png| | |[[File:Cupcake.png|75px|link=Cupcake]] <br /> [[Cupcake]] | ||
| | |{{AFix|Lil' Gummi.png|75px|link=Lil' Gummi}} [[Lil' Gummi]] | ||
|- | |- | ||
|21 | |21 | ||
| rowspan="10" |3 | <noinclude> | ||
|[[File:Rare Questing Crate.png| | | rowspan="10" |3</noinclude> | ||
|[[File:Quest Refresher.png| | |[[File:Rare Questing Crate.png|75px|link=Rare Questing Crate]] <br /> [[Questing Crate|Rare Questing Crate]] | ||
|[[File:Quest Refresher.png|75px|link=Quest Refresher]] <br /> [[Quest Refresher]] | |||
|- | |- | ||
|22 | |22 | ||
|[[File:Bronze Treasure Key.png| | |[[File:Bronze Treasure Key.png|75px|link=Bronze Treasure Key]] <br /> 2x [[Bronze Treasure Key]] | ||
|[[File:Candy Factory Token.png| | |[[File:Candy Factory Token.png|75px|link=Candy Factory Token]] <br /> 20x [[Seasonal Shop|Candy Factory Token]] | ||
|- | |- | ||
|23 | |23 | ||
|[[File:Boosted Crate Token.png| | |[[File:Boosted Crate Token.png|75px|link=Boosted Crate Token]] <br /> [[Boosted Crate Token]] | ||
|[[File:Forge Catalyst.png| | |[[File:Forge Catalyst.png|75px|link=Forge Catalyst]] <br /> [[Forge Catalyst]] | ||
|- | |- | ||
|24 | |24 | ||
|[[File:Rare Coin Quest Scroll.png| | |[[File:Rare Coin Quest Scroll.png|75px|link=Rare Coin Quest Scroll]] <br /> 2x [[Rare Coin Quest Scroll]] | ||
|[[File:Rare Material Crate.png| | |[[File:Rare Material Crate.png|75px|link=Rare Material Crate]] <br /> [[Material Crate|Rare Material Crate]] | ||
|- | |- | ||
|25 | |25 | ||
|[[File:Candy Factory Token.png| | |[[File:Candy Factory Token.png|75px|link=Candy Factory Token]] <br /> 10x [[Seasonal Shop|Candy Factory Token]] | ||
| | |{{AFix|Candy Factory Key.gif|75px|link=Candy Factory Key}} 2x [[Seasonal Shop|Candy Factory Key]] | ||
|- | |- | ||
|26 | |26 | ||
|[[File:Scroll Quest Reroll Token.png| | |[[File:Scroll Quest Reroll Token.png|75px|link=Scroll Quest Reroll Token]] <br /> 5x [[Scroll Quest Reroll Token]] | ||
|[[File:Boosted Crate Token.png| | |[[File:Boosted Crate Token.png|75px|link=Boosted Crate Token]] <br /> 2x [[Boosted Crate Token]] | ||
|- | |- | ||
|27 | |27 | ||
|[[File:Rare Material Crate.png| | |[[File:Rare Material Crate.png|75px|link=Rare Material Crate]] <br /> [[Material Crate|Rare Material Crate]] | ||
|[[File:Epic Coin Quest Scroll.png| | |[[File:Epic Coin Quest Scroll.png|75px|link=Epic Coin Quest Scroll]] <br /> 3x [[Epic Coin Quest Scroll]] | ||
|- | |- | ||
|28 | |28 | ||
|[[File:Silver Treasure Key.png| | |[[File:Silver Treasure Key.png|75px|link=Silver Treasure Key]] <br /> [[Silver Treasure Key]] | ||
|[[File:Candy Factory Token.png| | |[[File:Candy Factory Token.png|75px|link=Candy Factory Token]] <br /> 20x [[Seasonal Shop|Candy Factory Token]] | ||
|- | |- | ||
|29 | |29 | ||
|[[File:Rare Coin Quest Scroll.png| | |[[File:Rare Coin Quest Scroll.png|75px|link=Rare Coin Quest Scroll]] <br /> 2x [[Rare Coin Quest Scroll]] | ||
|[[File:Assembler Overdrive.png| | |[[File:Assembler Overdrive.png|75px|link=Assembler Overdrive]] <br /> [[Assembler Overdrive]] | ||
|- | |- | ||
|30 | |30 | ||
|[[File:Lollipop Staff (Minty).png| | |[[File:Lollipop Staff (Minty).png|75px|link=Lollipop Staff (Minty)]] <br /> [[Lollipop Staff (Minty)]] | ||
| | |{{AFix|Lollipop Staff (Chancellor).png|75px|link=Lollipop Staff (Chancellor)}} [[Lollipop Staff (Chancellor)]] | ||
|- | |- | ||
|31 | |31 | ||
| rowspan="10" |4 | <noinclude> | ||
|[[File:Bronze Treasure Chest.png| | | rowspan="10" |4</noinclude> | ||
|[[File:Overflowing Currency Pouch.png| | |[[File:Bronze Treasure Chest.png|75px|link=Bronze Treasure Chest]] <br /> 2x [[Bronze Treasure Chest]] | ||
|[[File:Overflowing Currency Pouch.png|75px|link=Overflowing Currency Pouch]] <br /> 2x [[Overflowing Currency Pouch]] | |||
|- | |- | ||
|32 | |32 | ||
|[[File:Candy Factory Token.png| | |[[File:Candy Factory Token.png|75px|link=Candy Factory Token]] <br /> 10x [[Seasonal Shop|Candy Factory Token]] | ||
|[[File:Candy Factory Token.png| | |[[File:Candy Factory Token.png|75px|link=Candy Factory Token]] <br /> 25x [[Seasonal Shop|Candy Factory Token]] | ||
|- | |- | ||
|33 | |33 | ||
|[[File:Boosted Crate Token.png| | |[[File:Boosted Crate Token.png|75px|link=Boosted Crate Token]] <br /> [[Boosted Crate Token]] | ||
|[[File:Epic Coin Quest Scroll.png| | |[[File:Epic Coin Quest Scroll.png|75px|link=Epic Coin Quest Scroll]] <br /> 3x [[Epic Coin Quest Scroll]] | ||
|- | |- | ||
|34 | |34 | ||
|[[File:Large Currency Pouch.png| | |[[File:Large Currency Pouch.png|75px|link=Large Currency Pouch]] <br /> 3x [[Large Currency Pouch]] | ||
|[[File:Epic Questing Crate.png| | |[[File:Epic Questing Crate.png|75px|link=Epic Questing Crate]] <br /> [[Questing Crate|Epic Questing Crate]] | ||
|- | |- | ||
|35 | |35 | ||
| | |{{AFix|Candy Factory Key.gif|75px|link=Candy Factory Key}} [[Seasonal Shop|Candy Factory Key]] | ||
| | |{{AFix|Choco Chancellor.png|75px|link=Choco Chancellor}} [[Choco Chancellor]] | ||
|- | |- | ||
|36 | |36 | ||
|[[File:Epic Material Quest Scroll.png| | |[[File:Epic Material Quest Scroll.png|75px|link=Epic Material Quest Scroll]] <br /> 2x [[Epic Material Quest Scroll]] | ||
|[[File:Ultimate Crate Token.png| | |[[File:Ultimate Crate Token.png|75px|link=Ultimate Crate Token]] <br /> [[Ultimate Crate Token]] | ||
|- | |- | ||
|37 | |37 | ||
|[[File:Silver Treasure Chest.png| | |[[File:Silver Treasure Chest.png|75px|link=Silver Treasure Chest]] <br /> [[Silver Treasure Chest]] | ||
|[[File:Golden Treasure Chest.png| | |[[File:Golden Treasure Chest.png|75px|link=Golden Treasure Chest]] <br /> [[Golden Treasure Chest]] | ||
|- | |- | ||
|38 | |38 | ||
|[[File:Candy Factory Token.png| | |[[File:Candy Factory Token.png|75px|link=Candy Factory Token]] <br /> 10x [[Seasonal Shop|Candy Factory Token]] | ||
|[[File:Candy Factory Token.png| | |[[File:Candy Factory Token.png|75px|link=Candy Factory Token]] <br /> 25x [[Seasonal Shop|Candy Factory Token]] | ||
|- | |- | ||
|39 | |39 | ||
|[[File:Forge Catalyst.png| | |[[File:Forge Catalyst.png|75px|link=Forge Catalyst]] <br /> [[Forge Catalyst]] | ||
|[[File:Forge Catalyst.png| | |[[File:Forge Catalyst.png|75px|link=Forge Catalyst]] <br /> 2x [[Forge Catalyst]] | ||
|- | |- | ||
|40 | |40 | ||
| | |{{AFix|Gumball Head.png|75px|link=Gumball Head}} [[Gumball Head]] | ||
| | |{{AFix|Choco Cloak.png|75px|link=Choco Cloak}} [[Choco Cloak]] | ||
|- | |- | ||
|41 | |41 | ||
| rowspan="10" |5 | <noinclude> | ||
|[[File:Overflowing Currency Pouch.png| | | rowspan="10" |5</noinclude> | ||
|[[File:Legendary Material Quest Scroll.png| | |[[File:Overflowing Currency Pouch.png|75px|link=Overflowing Currency Pouch]] <br /> 2x [[Overflowing Currency Pouch]] | ||
|[[File:Legendary Material Quest Scroll.png|75px|link=Legendary Material Quest Scroll]] <br /> 2x [[Legendary Material Quest Scroll]] | |||
|- | |- | ||
|42 | |42 | ||
|[[File:Candy Factory Token.png| | |[[File:Candy Factory Token.png|75px|link=Candy Factory Token]] <br /> 15x [[Seasonal Shop|Candy Factory Token]] | ||
|[[File:Candy Factory Token.png| | |[[File:Candy Factory Token.png|75px|link=Candy Factory Token]] <br /> 30x [[Seasonal Shop|Candy Factory Token]] | ||
|- | |- | ||
|43 | |43 | ||
|[[File:Assembler Overdrive.png| | |[[File:Assembler Overdrive.png|75px|link=Assembler Overdrive]] <br /> [[Assembler Overdrive]] | ||
|[[File:Assembler Overdrive.png| | |[[File:Assembler Overdrive.png|75px|link=Assembler Overdrive]] <br /> 2x [[Assembler Overdrive]] | ||
|- | |- | ||
|44 | |44 | ||
|[[File:Boosted Crate Token.png| | |[[File:Boosted Crate Token.png|75px|link=Boosted Crate Token]] <br /> 2x [[Boosted Crate Token]] | ||
|[[File:Mega Treasure Key.png| | |[[File:Mega Treasure Key.png|75px|link=Mega Treasure Key]] <br /> [[Mega Treasure Key]] | ||
|- | |- | ||
|45 | |45 | ||
| | |{{AFix|Candy Factory Key.gif|75px|link=Candy Factory Key}} [[Seasonal Shop|Candy Factory Key]] | ||
| | |{{AFix|Candy Factory Key.gif|75px|link=Candy Factory Key}} 2x [[Seasonal Shop|Candy Factory Key]] | ||
|- | |- | ||
|46 | |46 | ||
|[[File:Epic Coin Quest Scroll.png| | |[[File:Epic Coin Quest Scroll.png|75px|link=Epic Coin Quest Scroll]] <br /> 2x [[Epic Coin Quest Scroll]] | ||
|[[File:Legendary Coin Quest Scroll.png| | |[[File:Legendary Coin Quest Scroll.png|75px|link=Legendary Coin Quest Scroll]] <br /> 2x [[Legendary Coin Quest Scroll]] | ||
|- | |- | ||
|47 | |47 | ||
|[[File:Epic Material Crate.png| | |[[File:Epic Material Crate.png|75px|link=Epic Material Crate]] <br /> [[Material Crate|Epic Material Crate]] | ||
|[[File:Ultimate Crate Token.png| | |[[File:Ultimate Crate Token.png|75px|link=Ultimate Crate Token]] <br /> 2x [[Ultimate Crate Token]] | ||
|- | |- | ||
|48 | |48 | ||
|[[File:Candy Factory Token.png| | |[[File:Candy Factory Token.png|75px|link=Candy Factory Token]] <br /> 20x [[Seasonal Shop|Candy Factory Token]] | ||
|[[File:Candy Factory Token.png| | |[[File:Candy Factory Token.png|75px|link=Candy Factory Token]] <br /> 40x [[Seasonal Shop|Candy Factory Token]] | ||
|- | |- | ||
|49 | |49 | ||
|[[File:Epic Cosmetic Crate.png| | |[[File:Epic Cosmetic Crate.png|75px|link=Epic Cosmetic Crate]] <br /> [[Cosmetic Crate|Epic Cosmetic Crate]] | ||
|[[File:Legendary Cosmetic Crate.png| | |[[File:Legendary Cosmetic Crate.png|75px|link=Legendary Cosmetic Crate]] <br /> [[Cosmetic Crate|Legendary Cosmetic Crate]] | ||
|- | |- | ||
|50 | |50 | ||
| | |{{AFix|Mastery Key.gif|75px|link=Mastery Key}} [[Mastery Key]] | ||
| | |{{AFix|Mastery Key.gif|75px|link=Mastery Key}} [[Mastery Key]] | ||
|} | |} | ||
</onlyinclude> | </onlyinclude> | ||
== Cosmetics == | == Cosmetics == | ||
The following are all the [[ | The following are all the [[cosmetics]] that could be earnt during Season 3. | ||
With exception of the cosmetics from the Ultimate Battle Pass, all cosmetics | With exception of the cosmetics from the Ultimate Battle Pass, all cosmetics are still obtainable via the [[File:Icon-Legacy-Machine.png|20px]] [[Legacy Machine]]. | ||
<tabber> | <tabber> | ||
|-|Battle Pass= | |-|Battle Pass= | ||
The following [[ | The following [[cosmetics]] could be obtained from the [[Battle Pass]]. | ||
<center> | <center> | ||
| Line 232: | Line 295: | ||
!colspan="6"|[[File:BattlePass-Icon.png|20px]] Premium Road | !colspan="6"|[[File:BattlePass-Icon.png|20px]] Premium Road | ||
|- | |- | ||
| | |{{AFix|Gummi Paw.png|link=Gummi Paw}} <br /> [[Gummi Paw]] | ||
| | |{{AFix|Gummi.png|link=Gummi}} <br /> [[Gummi]] | ||
| | |{{AFix|Lil' Gummi.png|link=Lil' Gummi}} <br /> [[Lil' Gummi]] | ||
| | |{{AFix|Lollipop Staff (Chancellor).png|link=Lollipop Staff (Chancellor)}} <br /> [[Lollipop Staff (Chancellor)|Lollipop Staff <br /> (Chancellor)]] | ||
| | |{{AFix|Choco Chancellor.png|link=Choco Chancellor}} <br /> [[Choco Chancellor]] | ||
| | |{{AFix|Choco Cloak.png|link=Choco Cloak}} <br /> [[Choco Cloak]] | ||
|- | |- | ||
!style="border: none"| | !style="border: none"| | ||
| Line 243: | Line 306: | ||
|- | |- | ||
|style="border: none"| | |style="border: none"| | ||
|[[File:Cupcake Staff.png|150px|link=Cupcake Staff]]</ | |[[File:Cupcake Staff.png|150px|link=Cupcake Staff]] <br /><br /> [[Cupcake Staff]] | ||
|[[File:Cupcake.png|150px|link=Cupcake]]</ | |[[File:Cupcake.png|150px|link=Cupcake]] <br /><br /> [[Cupcake]] | ||
|[[File:Lollipop Staff (Minty).png|150px|link=Lollipop Staff (Minty)]] <br /> [[Lollipop Staff (Minty)]] | |[[File:Lollipop Staff (Minty).png|150px|link=Lollipop Staff (Minty)]] <br /><br /> [[Lollipop Staff (Minty)]] | ||
| | |{{AFix|Gumball Head.png|link=Gumball Head}} <br /> [[Gumball Head]] | ||
|} | |} | ||
</center> | </center> | ||
|-|Ultimate Battle Pass= | |-|Ultimate Battle Pass= | ||
The following [[ | The following [[cosmetics]] could be obtained by purchasing the [[Battle Pass]] from the [https://store.mccisland.net/ webstore]. | ||
They are now completely unobtainable as they are not in the [[File:Icon-Legacy-Machine.png|20px|link=Legacy Machine]] [[Legacy Machine]]'s pool. | |||
<center> | <center> | ||
{|class="wikitable" | {|class="wikitable" | ||
| | |{{AFix|Candy Bot.png|link=Candy Bot}} <br /> [[Candy Bot]] | ||
| | |{{AFix|Mixing Claw.png|link=Mixing Claw}} <br /> [[Mixing Claw]] | ||
| | |{{AFix|Candy Contraption.png|link=Candy Contraption}} <br /> [[Candy Contraption]] | ||
|} | |} | ||
</center> | </center> | ||
|-|Seasonal Machine= | |-|Seasonal Machine= | ||
The following [[ | The following [[cosmetics]] could be obtained by performing Seasonal Pulls with [[Seasonal Key]]s on the [[Seasonal Machine]]. | ||
<center> | <center> | ||
| Line 268: | Line 333: | ||
!colspan="4"|[[File:Rare.png|x18px]] | !colspan="4"|[[File:Rare.png|x18px]] | ||
|- | |- | ||
|[[File:Lollipop Staff (Sticky).png|150px|link=Lollipop Staff (Sticky)]]<br /><br /> [[Lollipop Staff (Sticky)]] | |[[File:Lollipop Staff (Sticky).png|150px|link=Lollipop Staff (Sticky)]] <br /><br /> [[Lollipop Staff (Sticky)]] | ||
| | |{{AFix|S'more Staff.png|link=S'more Staff}} <br /> [[S'more Staff]] | ||
| | |{{AFix|Mellowhead (Crackers).png|link=Mellowhead (Crackers)}} <br /> [[Mellowhead (Crackers)]] | ||
|[[File:Candy Hood.png|150px|link=Candy Hood]]<br /><br /> [[Candy Hood]] | |[[File:Candy Hood.png|150px|link=Candy Hood]] <br /><br /> [[Candy Hood]] | ||
|- | |- | ||
!colspan="4"|[[File:Epic.png|x18px]] | !colspan="4"|[[File:Epic.png|x18px]] | ||
|- | |- | ||
| | |{{AFix|Hot Chocolate.png|link=Hot Chocolate}} <br /> [[Hot Chocolate]] | ||
| | |{{AFix|Candy Flow.png|link=Candy Flow}} <br /> [[Candy Flow]] | ||
| | |{{AFix|Choccy.png|link=Choccy}} <br /> [[Choccy]] | ||
| | |{{AFix|Halo (Candy).png|link=Halo (Candy)}} <br /> [[Halo (Candy)]] | ||
|- | |- | ||
!style="border: none"| | !style="border: none"| | ||
| Line 284: | Line 349: | ||
|- | |- | ||
!style="border: none"| | !style="border: none"| | ||
| | |{{AFix|S'more Staff (Charred).png|link=S'more Staff (Charred)}} <br /> [[S'more Staff (Charred)]] | ||
| | |{{AFix|Mellowhead (S'more'd).png|link=Mellowhead (S'more'd)}} <br /> [[Mellowhead (S'more'd)]] | ||
|} | |} | ||
</center> | </center> | ||
|-|Seasonal Shop= | |-|Seasonal Shop= | ||
The following [[ | The following [[cosmetics]] could be obtained by interacting with [[The Inventor]] at the [[Candy Factory Shop]] and purchasing them for {{Display Link|Candy Factory Token|size=20px}}s. | ||
<center> | <center> | ||
{|class="wikitable" | {|class="wikitable" | ||
|[[File:Waffle Stack.png|150px|link=Waffle Stack]]<br /><br /> [[Waffle Stack]] | |[[File:Waffle Stack.png|150px|link=Waffle Stack]] <br /><br /> [[Waffle Stack]] | ||
|[[File:Hairbow (Peppermint).png|150px|link=Hairbow (Peppermint)]]<br /><br /> [[Hairbow (Peppermint)]] | |[[File:Hairbow (Peppermint).png|150px|link=Hairbow (Peppermint)]] <br /><br /> [[Hairbow (Peppermint)]] | ||
|[[File:Cupcake (Choco).png|150px|link=Cupcake (Choco)]]<br /><br /> [[Cupcake (Choco)]] | |[[File:Cupcake (Choco).png|150px|link=Cupcake (Choco)]] <br /><br /> [[Cupcake (Choco)]] | ||
| | |{{AFix|Mellowhead (Monarch).png|link=Mellowhead (Monarch)}} <br /> [[Mellowhead (Monarch)]] | ||
| | |{{AFix|Cupcake (Knight).png|link=Cupcake (Knight)}} <br /> [[Cupcake (Knight)]] | ||
|- | |- | ||
|[[File:Waffle Shield.png|150px|link=Waffle Shield]]<br /><br /> [[Waffle Shield]] | |[[File:Waffle Shield.png|150px|link=Waffle Shield]] <br /><br /> [[Waffle Shield]] | ||
|[[File:Lollipop Staff.png|150px|link=Lollipop Staff]]<br /><br /> [[Lollipop Staff]] | |[[File:Lollipop Staff.png|150px|link=Lollipop Staff]] <br /><br /> [[Lollipop Staff]] | ||
| | |{{AFix|Choco Shield.png|link=Choco Shield}} <br /> [[Choco Shield]] | ||
| | |{{AFix|S'more Staff (Royalty).png|link=S'more Staff (Royalty)}} <br /> [[S'more Staff (Royalty)]] | ||
|[[File:Cupcake Staff (Spearhead).png|150px|link=Cupcake Staff (Spearhead)]]<br /><br /> [[Cupcake Staff (Spearhead)]] | |[[File:Cupcake Staff (Spearhead).png|150px|link=Cupcake Staff (Spearhead)]] <br /><br /> [[Cupcake Staff (Spearhead)]] | ||
|} | |} | ||
</center> | </center> | ||
</tabber> | </tabber> | ||
The Battle Pass for Season 3 contained 50 levels and required between 1-5 Battle Pass Points per level. The premium road could be bought for 450 ![]() or on the Webstore.
or on the Webstore.
Battle Pass points could be earnt by earning Faction XP. The amount of Faction XP needed for each point increased every time one was claimed (max of 7 claims a day), and reset each day.
| Point | XP needed |
| 1 | 100 XP |
| 2 | 500 XP |
| 3 | 1,000 XP |
| 4 | 1,500 XP |
| 5 | 2,000 XP |
| 6 | 3,000 XP |
| 7 | 4,000 XP |
Once a player unlocked every level of the Battle Pass, the Bonus Meter unlocked, which rewarded players with Candy Factory Tokens each time it was filled. The required Faction XP for the meter to fill increased every 50 claims.
| Claims | XP needed |
| 1 - 50 | 500 XP |
| 51 - 100 | 750 XP |
| 101 - 150 | 1,000 XP |
| 151 - 200 | 1,500 XP |
| 201 - 250 | 2,000 XP |
| 251 - 300 | 2,500 XP |
| 301 - 500 | 3,000 XP |
The Battle Pass had the following rewards at each level:
The following are all the cosmetics that could be earnt during Season 3.
With exception of the cosmetics from the Ultimate Battle Pass, all cosmetics are still obtainable via the ![]() Legacy Machine.
Legacy Machine.
The following cosmetics could be obtained from the Battle Pass.
Gummi Paw |
Gummi |
Lil' Gummi |
Lollipop Staff (Chancellor) |
Choco Chancellor |
Choco Cloak |
 Cupcake Staff |
 Cupcake |
 Lollipop Staff (Minty) |
Gumball Head | ||
The following cosmetics could be obtained by purchasing the Battle Pass from the webstore.
They are now completely unobtainable as they are not in the ![]() Legacy Machine's pool.
Legacy Machine's pool.
Candy Bot |
Mixing Claw |
Candy Contraption |
The following cosmetics could be obtained by performing Seasonal Pulls with Seasonal Keys on the Seasonal Machine.
 Lollipop Staff (Sticky) |
S'more Staff |
Mellowhead (Crackers) |
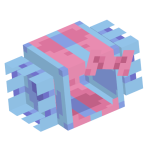 Candy Hood |
Hot Chocolate |
Candy Flow |
Choccy |
Halo (Candy) |
S'more Staff (Charred) |
Mellowhead (S'more'd) | ||
The following cosmetics could be obtained by interacting with The Inventor at the Candy Factory Shop and purchasing them for ![]() Candy Factory Tokens.
Candy Factory Tokens.
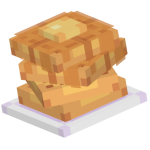 Waffle Stack |
 Hairbow (Peppermint) |
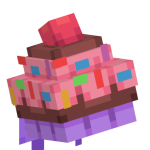 Cupcake (Choco) |
Mellowhead (Monarch) |
Cupcake (Knight) |
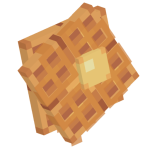 Waffle Shield |
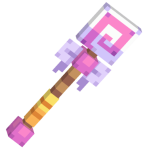 Lollipop Staff |
Choco Shield |
S'more Staff (Royalty) |
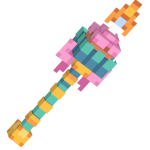 Cupcake Staff (Spearhead) |