The following cosmetics could be obtained from the Battle Pass.
(Chancellor) |
|||||
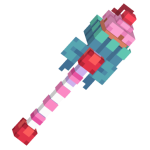 Cupcake Staff |
 Cupcake |
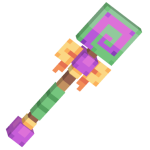 Lollipop Staff (Minty) |
|||
Archived Battle Pass Points info from Battle Pass page + other visual/technical changes |
m Fixed some links |
||
| Line 62: | Line 62: | ||
The Battle Pass had the following rewards at each level: | The Battle Pass had the following rewards at each level: | ||
<onlyinclude>{| class="wikitable mw-collapsible mw-collapsed" | <onlyinclude> | ||
{| class="wikitable mw-collapsible mw-collapsed" | |||
!Level | !Level | ||
<noinclude>!Battle Pass Point Cost</noinclude> | <noinclude> | ||
!Battle Pass Point Cost</noinclude> | |||
![[File:FreeBattlePass-Icon.png|20px]] Free Road | ![[File:FreeBattlePass-Icon.png|20px]] Free Road | ||
![[File:BattlePass-Icon.png|20px]] Premium Road | ![[File:BattlePass-Icon.png|20px]] Premium Road | ||
|- | |- | ||
|1 | |1 | ||
<noinclude>| rowspan="10" |1</noinclude> | <noinclude> | ||
| rowspan="10" |1</noinclude> | |||
|[[File:Bronze Treasure Key.png|75px|link=Bronze Treasure Key]] <br /> [[Bronze Treasure Key]] | |[[File:Bronze Treasure Key.png|75px|link=Bronze Treasure Key]] <br /> [[Bronze Treasure Key]] | ||
|[[File:Silver Treasure Key.png|75px|link=Silver Treasure Key]] <br /> [[Silver Treasure Key]] | |[[File:Silver Treasure Key.png|75px|link=Silver Treasure Key]] <br /> [[Silver Treasure Key]] | ||
| Line 110: | Line 113: | ||
|- | |- | ||
|11 | |11 | ||
<noinclude>| rowspan="10" |2</noinclude> | <noinclude> | ||
| rowspan="10" |2</noinclude> | |||
|[[File:Bronze Treasure Key.png|75px|link=Bronze Treasure Key]] <br /> [[Bronze Treasure Key]] | |[[File:Bronze Treasure Key.png|75px|link=Bronze Treasure Key]] <br /> [[Bronze Treasure Key]] | ||
|[[File:Epic Coin Quest Scroll.png|75px|link=Epic Coin Quest Scroll]] <br /> 2x [[Epic Coin Quest Scroll]] | |[[File:Epic Coin Quest Scroll.png|75px|link=Epic Coin Quest Scroll]] <br /> 2x [[Epic Coin Quest Scroll]] | ||
| Line 151: | Line 155: | ||
|- | |- | ||
|21 | |21 | ||
<noinclude>| rowspan="10" |3</noinclude> | <noinclude> | ||
| rowspan="10" |3</noinclude> | |||
|[[File:Rare Questing Crate.png|75px|link=Rare Questing Crate]] <br /> [[Questing Crate|Rare Questing Crate]] | |[[File:Rare Questing Crate.png|75px|link=Rare Questing Crate]] <br /> [[Questing Crate|Rare Questing Crate]] | ||
|[[File:Quest Refresher.png|75px|link=Quest Refresher]] <br /> [[Quest Refresher]] | |[[File:Quest Refresher.png|75px|link=Quest Refresher]] <br /> [[Quest Refresher]] | ||
| Line 192: | Line 197: | ||
|- | |- | ||
|31 | |31 | ||
<noinclude>| rowspan="10" |4</noinclude> | <noinclude> | ||
| rowspan="10" |4</noinclude> | |||
|[[File:Bronze Treasure Chest.png|75px|link=Bronze Treasure Chest]] <br /> 2x [[Bronze Treasure Chest]] | |[[File:Bronze Treasure Chest.png|75px|link=Bronze Treasure Chest]] <br /> 2x [[Bronze Treasure Chest]] | ||
|[[File:Overflowing Currency Pouch.png|75px|link=Overflowing Currency Pouch]] <br /> 2x [[Overflowing Currency Pouch]] | |[[File:Overflowing Currency Pouch.png|75px|link=Overflowing Currency Pouch]] <br /> 2x [[Overflowing Currency Pouch]] | ||
| Line 233: | Line 239: | ||
|- | |- | ||
|41 | |41 | ||
<noinclude>| rowspan="10" |5</noinclude> | <noinclude> | ||
| rowspan="10" |5</noinclude> | |||
|[[File:Overflowing Currency Pouch.png|75px|link=Overflowing Currency Pouch]] <br /> 2x [[Overflowing Currency Pouch]] | |[[File:Overflowing Currency Pouch.png|75px|link=Overflowing Currency Pouch]] <br /> 2x [[Overflowing Currency Pouch]] | ||
|[[File:Legendary Material Quest Scroll.png|75px|link=Legendary Material Quest Scroll]] <br /> 2x [[Legendary Material Quest Scroll]] | |[[File:Legendary Material Quest Scroll.png|75px|link=Legendary Material Quest Scroll]] <br /> 2x [[Legendary Material Quest Scroll]] | ||
| Line 272: | Line 279: | ||
|<center><div style="width: 75px">[[File:Mastery Key.gif|link=Mastery Key]]</div></center> [[Mastery Key]] | |<center><div style="width: 75px">[[File:Mastery Key.gif|link=Mastery Key]]</div></center> [[Mastery Key]] | ||
|<center><div style="width: 75px">[[File:Mastery Key.gif|link=Mastery Key]]</div></center> [[Mastery Key]] | |<center><div style="width: 75px">[[File:Mastery Key.gif|link=Mastery Key]]</div></center> [[Mastery Key]] | ||
|}</onlyinclude> | |} | ||
</onlyinclude> | |||
== Cosmetics == | == Cosmetics == | ||
| Line 326: | Line 334: | ||
|- | |- | ||
|[[File:Lollipop Staff (Sticky).png|150px|link=Lollipop Staff (Sticky)]]<br /><br /> [[Lollipop Staff (Sticky)]] | |[[File:Lollipop Staff (Sticky).png|150px|link=Lollipop Staff (Sticky)]]<br /><br /> [[Lollipop Staff (Sticky)]] | ||
|<div style="width: 150px; height: 150px">[[File:Smore Staff.gif|link=Smore Staff]]</div><br /> [[ | |<div style="width: 150px; height: 150px">[[File:Smore Staff.gif|link=Smore Staff]]</div><br /> [[S'more Staff]] | ||
|<div style="width: 150px; height: 150px">[[File:Mellowhead (Cracker).gif|link=Mellowhead (Cracker)]]</div><br /> [[Mellowhead (Cracker)]] | |<div style="width: 150px; height: 150px">[[File:Mellowhead (Cracker).gif|link=Mellowhead (Cracker)]]</div><br /> [[Mellowhead (Cracker)]] | ||
|[[File:Candy Hood.png|150px|link=Candy Hood]]<br /><br /> [[Candy Hood]] | |[[File:Candy Hood.png|150px|link=Candy Hood]]<br /><br /> [[Candy Hood]] | ||
| Line 341: | Line 349: | ||
|- | |- | ||
!style="border: none"| | !style="border: none"| | ||
|<div style="width: 150px; height: 150px">[[File:Smore Staff (Charred).gif|link=Smore Staff (Charred)]]</div><br /> [[ | |<div style="width: 150px; height: 150px">[[File:Smore Staff (Charred).gif|link=Smore Staff (Charred)]]</div><br /> [[S'more Staff (Charred)]] | ||
|<div style="width: 150px; height: 150px">[[File:Mellowhead (S'more'd).gif|link=Mellowhead (S'more'd)]]</div><br /> [[Mellowhead (S'more'd)]] | |<div style="width: 150px; height: 150px">[[File:Mellowhead (S'more'd).gif|link=Mellowhead (S'more'd)]]</div><br /> [[Mellowhead (S'more'd)]] | ||
|} | |} | ||
| Line 360: | Line 368: | ||
|[[File:Lollipop Staff.png|150px|link=Lollipop Staff]]<br /><br /> [[Lollipop Staff]] | |[[File:Lollipop Staff.png|150px|link=Lollipop Staff]]<br /><br /> [[Lollipop Staff]] | ||
|<div style="width: 150px; height: 150px">[[File:Choco Shield.gif|link=Choco Shield]]</div><br /> [[Choco Shield]] | |<div style="width: 150px; height: 150px">[[File:Choco Shield.gif|link=Choco Shield]]</div><br /> [[Choco Shield]] | ||
|<div style="width: 150px; height: 150px">[[File:Smore Staff (Royalty).gif|link=Smore Staff (Royalty)]]</div><br /> [[ | |<div style="width: 150px; height: 150px">[[File:Smore Staff (Royalty).gif|link=Smore Staff (Royalty)]]</div><br /> [[S'more Staff (Royalty)]] | ||
|[[File:Cupcake Staff (Spearhead).png|150px|link=Cupcake Staff (Spearhead)]]<br /><br /> [[Cupcake Staff (Spearhead)]] | |[[File:Cupcake Staff (Spearhead).png|150px|link=Cupcake Staff (Spearhead)]]<br /><br /> [[Cupcake Staff (Spearhead)]] | ||
|} | |} | ||
</center> | </center> | ||
</tabber> | </tabber> | ||
The Battle Pass for Season 3 contained 50 levels and required between 1-5 Battle Pass Points per level. The premium road could be bought for 450 ![]() or on the Webstore.
or on the Webstore.
Battle Pass points could be earnt by earning Faction XP. The amount of Faction XP needed for each point increased every time one was claimed (max of 7 claims a day), and reset each day.
| Point | XP needed |
| 1 | 100 XP |
| 2 | 500 XP |
| 3 | 1,000 XP |
| 4 | 1,500 XP |
| 5 | 2,000 XP |
| 6 | 3,000 XP |
| 7 | 4,000 XP |
Once a player unlocked every level of the Battle Pass, the Bonus Meter unlocked, which rewarded players with Candy Factory Tokens each time it was filled. The required Faction XP for the meter to fill increased every 50 claims.
| Claims | XP needed |
| 1 - 50 | 500 XP |
| 51 - 100 | 750 XP |
| 101 - 150 | 1,000 XP |
| 151 - 200 | 1,500 XP |
| 201 - 250 | 2,000 XP |
| 251 - 300 | 2,500 XP |
| 301+ | 3,000 XP |
The Battle Pass had the following rewards at each level:
The following are all the cosmetics that could be earnt during Season 3.
With exception of the cosmetics from the Ultimate Battle Pass, all cosmetics are still obtainable via the ![]() Legacy Machine.
Legacy Machine.
The following cosmetics could be obtained from the Battle Pass.
(Chancellor) |
|||||
 Cupcake Staff |
 Cupcake |
 Lollipop Staff (Minty) |
|||
The following cosmetics could be obtained by purchasing the Battle Pass from the webstore.
They are now completely unobtainable as they are not in the ![]() Legacy Machine's pool.
Legacy Machine's pool.
Candy Bot |
Mixing Claw |
Candy Contraption |
The following cosmetics could be obtained by performing Seasonal Pulls with Seasonal Keys on the Seasonal Machine.
 Lollipop Staff (Sticky) |
S'more Staff |
Mellowhead (Cracker) |
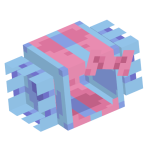 Candy Hood |
Hot Chocolate |
Candy Flow |
Choccy |
Halo (Candy) |
S'more Staff (Charred) |
Mellowhead (S'more'd) | ||
The following cosmetics could be obtained by interacting with The Inventor at the Candy Factory Shop and purchasing them for ![]() Candy Factory Tokens.
Candy Factory Tokens.
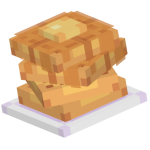 Waffle Stack |
 Hairbow (Peppermint) |
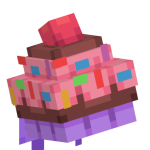 Cupcake (Choco) |
Mellowhead (Monarch) |
Cupcake (Knight) |
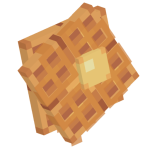 Waffle Shield |
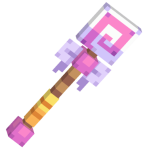 Lollipop Staff |
Choco Shield |
S'more Staff (Royalty) |
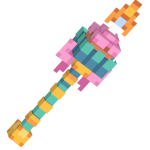 Cupcake Staff (Spearhead) |