|
|
| Line 4: |
Line 4: |
| == Battle Pass == | | == Battle Pass == |
| The [[Battle Pass]] for Season 4 contains 100 levels and requires [[Island XP]] to progress. The premium road can be bought for 650 {{Gem|size=16px}} or on the [https://store.mccisland.net Webstore]. It has the following rewards at each level: | | The [[Battle Pass]] for Season 4 contains 100 levels and requires [[Island XP]] to progress. The premium road can be bought for 650 {{Gem|size=16px}} or on the [https://store.mccisland.net Webstore]. It has the following rewards at each level: |
|
| |
| <onlyinclude> | | <onlyinclude> |
| {| class="wikitable mw-collapsible mw-collapsed" | | {| class="wikitable mw-collapsible mw-collapsed" |
| Line 49: |
Line 48: |
| |10 | | |10 |
| |[[File:Skull Orb (Stone).png|75px|link=Skull Orb (Stone)]] <br /> [[Skull Orb (Stone)]] | | |[[File:Skull Orb (Stone).png|75px|link=Skull Orb (Stone)]] <br /> [[Skull Orb (Stone)]] |
| |<center><div style="width: 75px">[[File:Voodoo Doll.gif|link=Voodoo Doll]]</div></center> [[Voodoo Doll]] | | |{{AFix|75px}}[[File:Voodoo Doll.png|link=Voodoo Doll]]{{AFixEnd}} [[Voodoo Doll]] |
| |- | | |- |
| |11 | | |11 |
| Line 89: |
Line 88: |
| |20 | | |20 |
| |[[File:Skull Crown (Stone).png|75px|link=Skull Crown (Stone)]] <br /> [[Skull Crown (Stone)]] | | |[[File:Skull Crown (Stone).png|75px|link=Skull Crown (Stone)]] <br /> [[Skull Crown (Stone)]] |
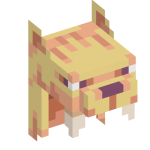
| |<center><div style="width: 75px">[[File:Witch Doctor's Mask.gif|link=Witch Doctor's Mask]]</div></center> [[Witch Doctor's Mask]] | | |{{AFix|75px}}[[File:Witch Doctor's Mask.png|link=Witch Doctor's Mask]]{{AFixEnd}} [[Witch Doctor's Mask]] |
| |- | | |- |
| |21 | | |21 |
| Line 108: |
Line 107: |
| |- | | |- |
| |25 | | |25 |
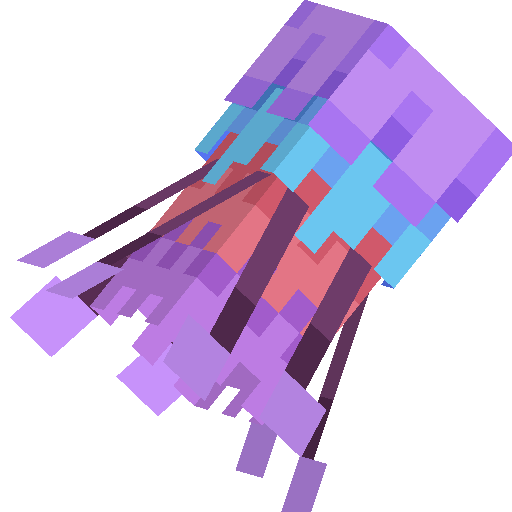
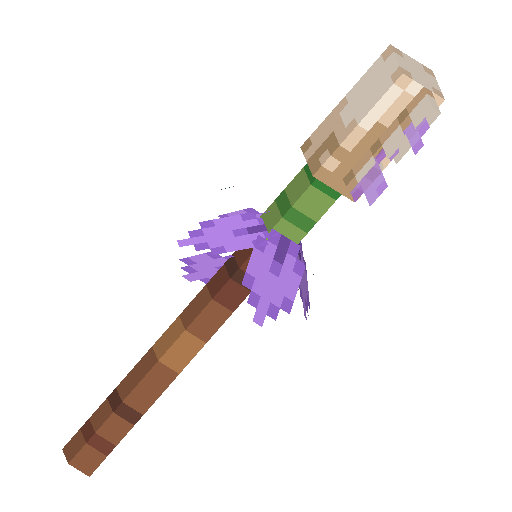
| |<center><div style="width: 75px">[[File:Ancient Jungle Shard.gif|link=Ancient Jungle Shard]]</div></center> 2x [[Seasonal Shard|Ancient Jungle Shard]] | | |{{AFix|75px}}[[File:Ancient Jungle Shard.gif|link=Ancient Jungle Shard]]{{AFixEnd}} 2x [[Seasonal Shard|Ancient Jungle Shard]] |
| |<center><div style="width: 75px">[[File:Ancient Jungle Shard.gif|link=Ancient Jungle Shard]]</div></center> 2x [[Seasonal Shard|Ancient Jungle Shard]] | | |{{AFix|75px}}[[File:Ancient Jungle Shard.gif|link=Ancient Jungle Shard]]{{AFixEnd}} 2x [[Seasonal Shard|Ancient Jungle Shard]] |
| |- | | |- |
| |26 | | |26 |
| Line 129: |
Line 128: |
| |30 | | |30 |
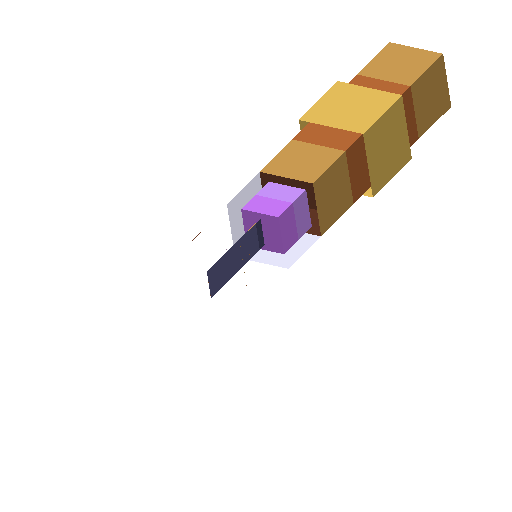
| |[[File:Bone Spear.png|75px|link=Bone Spear]] <br /> [[Bone Spear]] | | |[[File:Bone Spear.png|75px|link=Bone Spear]] <br /> [[Bone Spear]] |
| |<center><div style="width: 75px">[[File:Swarm Basket.gif|link=Swarm Basket]]</div></center> [[Swarm Basket]] | | |{{AFix|75px}}[[File:Swarm Basket.png|link=Swarm Basket]]{{AFixEnd}} [[Swarm Basket]] |
| |- | | |- |
| |31 | | |31 |
| Line 169: |
Line 168: |
| |40 | | |40 |
| |[[File:Sabertooth Cap.png|75px|link=Sabertooth Cap]] <br /> [[Sabertooth Cap]] | | |[[File:Sabertooth Cap.png|75px|link=Sabertooth Cap]] <br /> [[Sabertooth Cap]] |
| |<center><div style="width: 75px">[[File:Wheel of Destiny.gif|link=Wheel of Destiny]]</div></center> [[Wheel of Destiny]] | | |{{AFix|75px}}[[File:Wheel of Destiny.png|link=Wheel of Destiny]]{{AFixEnd}} [[Wheel of Destiny]] |
| |- | | |- |
| |41 | | |41 |
| Line 189: |
Line 188: |
| |45 | | |45 |
| |[[File:Ancient Jungle Token.png|75px|link=Ancient Jungle Token]] <br /> 50x [[Ancient Jungle Token]] | | |[[File:Ancient Jungle Token.png|75px|link=Ancient Jungle Token]] <br /> 50x [[Ancient Jungle Token]] |
| |<center><div style="width: 75px">[[File:Ancient Jungle Shard.gif|link=Ancient Jungle Shard]]</div></center> 2x [[Ancient Jungle Shard]] | | |{{AFix|75px}}[[File:Ancient Jungle Shard.gif|link=Ancient Jungle Shard]]{{AFixEnd}} 2x [[Ancient Jungle Shard]] |
| |- | | |- |
| |46 | | |46 |
| Line 208: |
Line 207: |
| |- | | |- |
| |50 | | |50 |
| |<center><div style="width: 75px">[[File:Ancient Jungle Shard.gif|link=Ancient Jungle Shard]]</div></center> 2x [[Ancient Jungle Shard]] | | |{{AFix|75px}}[[File:Ancient Jungle Shard.gif|link=Ancient Jungle Shard]]{{AFixEnd}} 2x [[Ancient Jungle Shard]] |
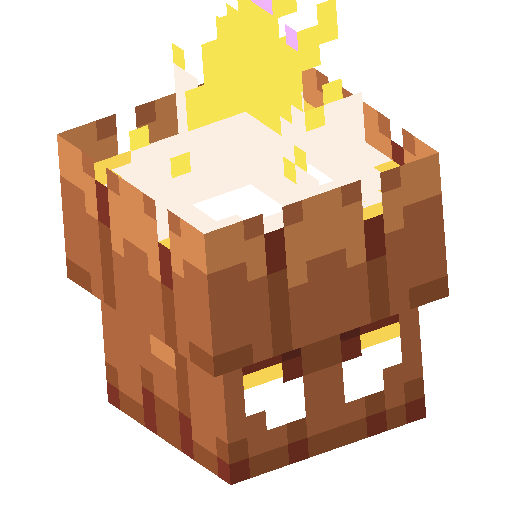
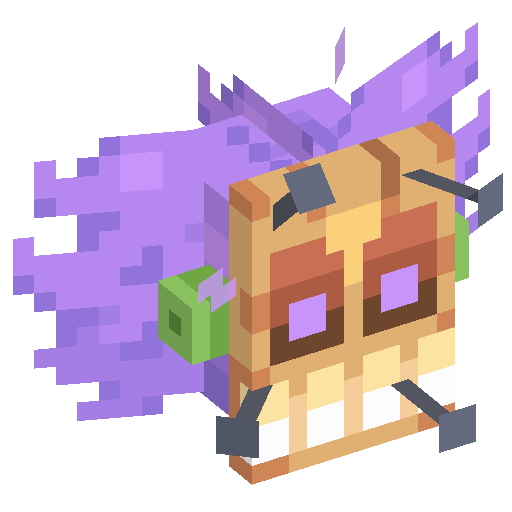
| |<center><div style="width: 75px">[[File:Stone Dragon Emperor.gif|link=Stone Dragon Emperor]]</div></center> [[Stone Dragon Emperor]] | | |{{AFix|75px}}[[File:Stone Dragon Emperor.png|link=Stone Dragon Emperor]]{{AFixEnd}} [[Stone Dragon Emperor]] |
| |- | | |- |
| |51 | | |51 |
| Line 248: |
Line 247: |
| |- | | |- |
| |60 | | |60 |
| |<center><div style="width: 75px">[[File:Jawbone Saw.gif|link=Jawbone Saw]]</div></center> [[Jawbone Saw]] | | |{{AFix|75px}}[[File:Jawbone Saw.png|link=Jawbone Saw]]{{AFixEnd}} [[Jawbone Saw]] |
| |<center><div style="width: 75px">[[File:Tail of Wisdom.gif|link=Tail of Wisdom]]</div></center> [[Tail of Wisdom]] | | |{{AFix|75px}}[[File:Tail of Wisdom.png|link=Tail of Wisdom]]{{AFixEnd}} [[Tail of Wisdom]] |
| |- | | |- |
| |61 | | |61 |
| Line 265: |
Line 264: |
| |64 | | |64 |
| |[[File:Magical Chroma Pack.png|75px|link=Magical Chroma Pack]] <br /> [[Magical Chroma Pack]] | | |[[File:Magical Chroma Pack.png|75px|link=Magical Chroma Pack]] <br /> [[Magical Chroma Pack]] |
| |<center><div style="width: 75px">[[File:Prismatic Chroma Pack.gif|link=Prismatic Chroma Pack]]</div></center> [[Prismatic Chroma Pack]] | | |{{AFix|75px}}[[File:Prismatic Chroma Pack.gif|link=Prismatic Chroma Pack]]{{AFixEnd}} [[Prismatic Chroma Pack]] |
| |- | | |- |
| |65 | | |65 |
| |[[File:Ancient Jungle Token.png|75px|link=Ancient Jungle Token]] <br /> 25x [[Ancient Jungle Token]] | | |[[File:Ancient Jungle Token.png|75px|link=Ancient Jungle Token]] <br /> 25x [[Ancient Jungle Token]] |
| |<center><div style="width: 75px">[[File:Ancient Jungle Shard.gif|link=Ancient Jungle Shard]]</div></center> 2x [[Ancient Jungle Shard]] | | |{{AFix|75px}}[[File:Ancient Jungle Shard.gif|link=Ancient Jungle Shard]]{{AFixEnd}} 2x [[Ancient Jungle Shard]] |
| |- | | |- |
| |66 | | |66 |
| Line 289: |
Line 288: |
| |70 | | |70 |
| |[[File:Ancient Jungle Token.png|75px|link=Ancient Jungle Token]] <br /> 25x [[Ancient Jungle Token]] | | |[[File:Ancient Jungle Token.png|75px|link=Ancient Jungle Token]] <br /> 25x [[Ancient Jungle Token]] |
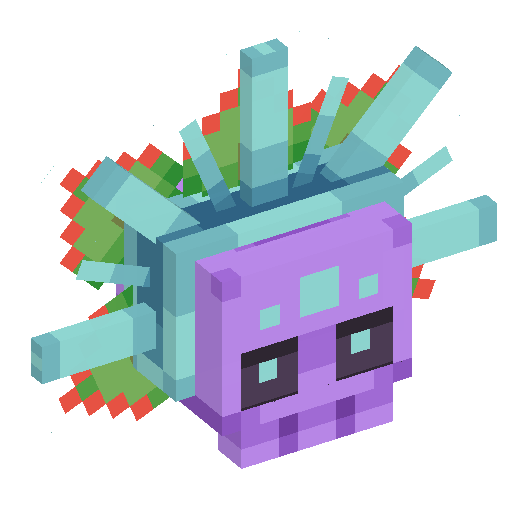
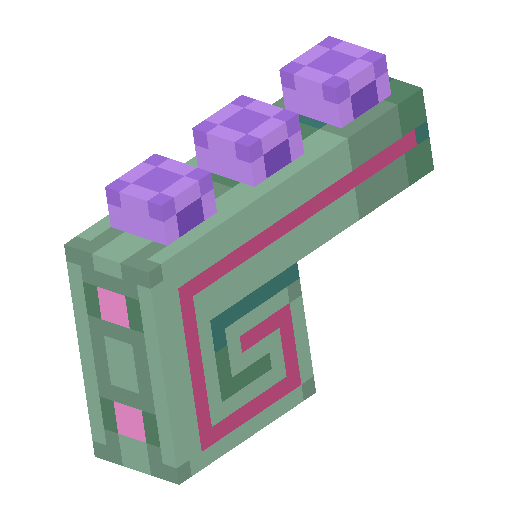
| |<center><div style="width: 75px">[[File:Hive Fist.gif|link=Hive Fist]]</div></center> [[Hive Fist]] | | |{{AFix|75px}}[[File:Hive Fist.png|link=Hive Fist]]{{AFixEnd}} [[Hive Fist]] |
| |- | | |- |
| |71 | | |71 |
| Line 328: |
Line 327: |
| |- | | |- |
| |80 | | |80 |
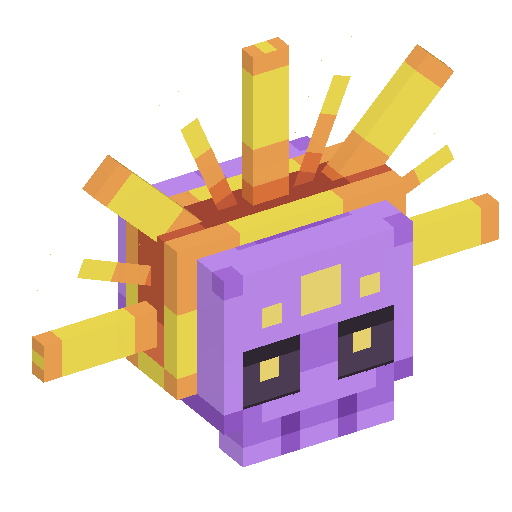
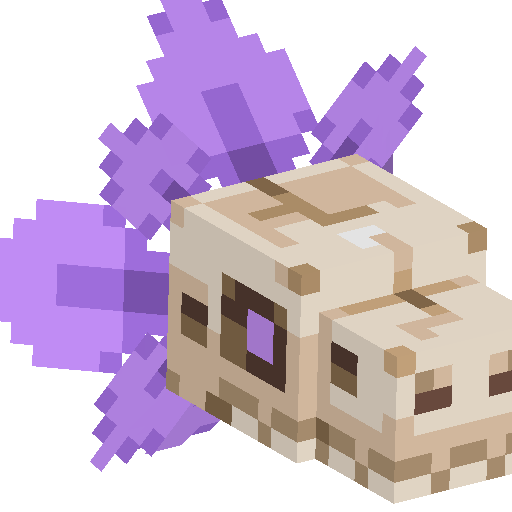
| |<center><div style="width: 75px">[[File:Raptor Skull.gif|link=Raptor Skull]]</div></center> [[Raptor Skull]] | | |{{AFix|75px}}[[File:Raptor Skull.png|link=Raptor Skull]]{{AFixEnd}} [[Raptor Skull]] |
| |<center><div style="width: 75px">[[File:Beetleface.gif|link=Beetleface]]</div></center> [[Beetleface]] | | |{{AFix|75px}}[[File:Beetleface.png|link=Beetleface]]{{AFixEnd}} [[Beetleface]] |
| |- | | |- |
| |81 | | |81 |
| Line 349: |
Line 348: |
| |85 | | |85 |
| |[[File:Ancient Jungle Token.png|75px|link=Ancient Jungle Token]] <br /> 25x [[Ancient Jungle Token]] | | |[[File:Ancient Jungle Token.png|75px|link=Ancient Jungle Token]] <br /> 25x [[Ancient Jungle Token]] |
| |<center><div style="width: 75px">[[File:Ancient Jungle Shard.gif|link=Ancient Jungle Shard]]</div></center> 2x [[Ancient Jungle Shard]] | | |{{AFix|75px}}[[File:Ancient Jungle Shard.gif|link=Ancient Jungle Shard]]{{AFixEnd}} 2x [[Ancient Jungle Shard]] |
| |- | | |- |
| |86 | | |86 |
| Line 369: |
Line 368: |
| |90 | | |90 |
| |[[File:Ancient Jungle Token.png|75px|link=Ancient Jungle Token]] <br /> 25x [[Ancient Jungle Token]] | | |[[File:Ancient Jungle Token.png|75px|link=Ancient Jungle Token]] <br /> 25x [[Ancient Jungle Token]] |
| |<center><div style="width: 75px">[[File:Beehive.gif|link=Beehive]]</div></center> [[Beehive]] | | |{{AFix|75px}}[[File:Beehive.png|link=Beehive]]{{AFixEnd}} [[Beehive]] |
| |- | | |- |
| |91 | | |91 |
| Line 377: |
Line 376: |
| |92 | | |92 |
| |[[File:Mechanical Chroma Pack.png|75px|link=Mechanical Chroma Pack]] <br /> [[Mechanical Chroma Pack]] | | |[[File:Mechanical Chroma Pack.png|75px|link=Mechanical Chroma Pack]] <br /> [[Mechanical Chroma Pack]] |
| |<center><div style="width: 75px">[[File:Prismatic Chroma Pack.gif|link=Prismatic Chroma Pack]]</div></center> [[Prismatic Chroma Pack]] | | |{{AFix|75px}}[[File:Prismatic Chroma Pack.gif|link=Prismatic Chroma Pack]]{{AFixEnd}} [[Prismatic Chroma Pack]] |
| |- | | |- |
| |93 | | |93 |
| Line 404: |
Line 403: |
| |- | | |- |
| |99 | | |99 |
| |<center><div style="width: 75px">[[File:Ancient Jungle Shard.gif|link=Ancient Jungle Shard]]</div></center> 2x [[Ancient Jungle Shard]] | | |{{AFix|75px}}[[File:Ancient Jungle Shard.gif|link=Ancient Jungle Shard]]{{AFixEnd}} 2x [[Ancient Jungle Shard]] |
| |<center><div style="width: 75px">[[File:Ancient Jungle Shard.gif|link=Ancient Jungle Shard]]</div></center> 2x [[Ancient Jungle Shard]] | | |{{AFix|75px}}[[File:Ancient Jungle Shard.gif|link=Ancient Jungle Shard]]{{AFixEnd}} 2x [[Ancient Jungle Shard]] |
| |- | | |- |
| |100 | | |100 |
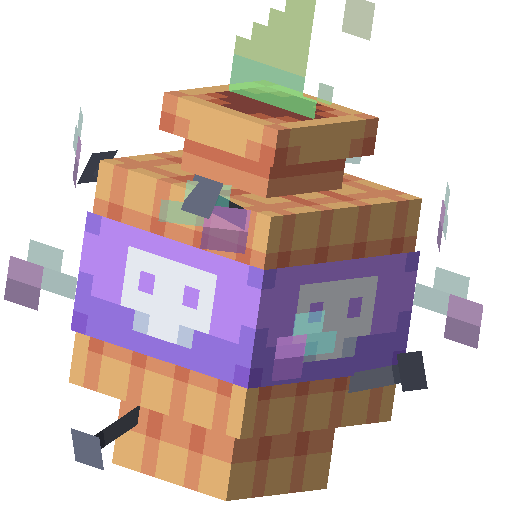
| |<center><div style="width: 75px">[[File:Mythic Cosmetic Key.gif|link=Mythic Cosmetic Key]]</div></center> [[Mythic Cosmetic Key]] | | |{{AFix|75px}}[[File:Mythic Cosmetic Key.gif|link=Mythic Cosmetic Key]]{{AFixEnd}} [[Mythic Cosmetic Key]] |
| |<center><div style="width: 75px">[[File:Mythic Cosmetic Key.gif|link=Mythic Cosmetic Key]]</div></center> 2x [[Mythic Cosmetic Key]] | | |{{AFix|75px}}[[File:Mythic Cosmetic Key.gif|link=Mythic Cosmetic Key]]{{AFixEnd}} 2x [[Mythic Cosmetic Key]] |
| |} | | |}</onlyinclude> |
| </onlyinclude> | |
|
| |
|
| == Cosmetics == | | == Cosmetics == |
| Line 426: |
Line 424: |
| !colspan="5"|[[File:BattlePass-Icon.png|20px]] Premium Road | | !colspan="5"|[[File:BattlePass-Icon.png|20px]] Premium Road |
| |- | | |- |
| |<center><div style="width: 150px">[[File:Voodoo Doll.gif|link=Voodoo Doll]]</div></center> [[Voodoo Doll]] | | |{{AFix}}[[File:Voodoo Doll.png|link=Voodoo Doll]]{{AFixEnd}} [[Voodoo Doll]] |
| |<center><div style="width: 150px">[[File:Witch Doctor's Mask.gif|link=Witch Doctor's Mask]]</div></center> [[Witch Doctor's Mask]] | | |{{AFix}}[[File:Witch Doctor's Mask.png|link=Witch Doctor's Mask]]{{AFixEnd}} [[Witch Doctor's Mask]] |
| |<center><div style="width: 150px">[[File:Swarm Basket.gif|link=Swarm Basket]]</div></center> [[Swarm Basket]] | | |{{AFix}}[[File:Swarm Basket.png|link=Swarm Basket]]{{AFixEnd}} [[Swarm Basket]] |
| |<center><div style="width: 150px">[[File:Wheel of Destiny.gif|link=Wheel of Destiny]]</div></center> [[Wheel of Destiny]] | | |{{AFix}}[[File:Wheel of Destiny.png|link=Wheel of Destiny]]{{AFixEnd}} [[Wheel of Destiny]] |
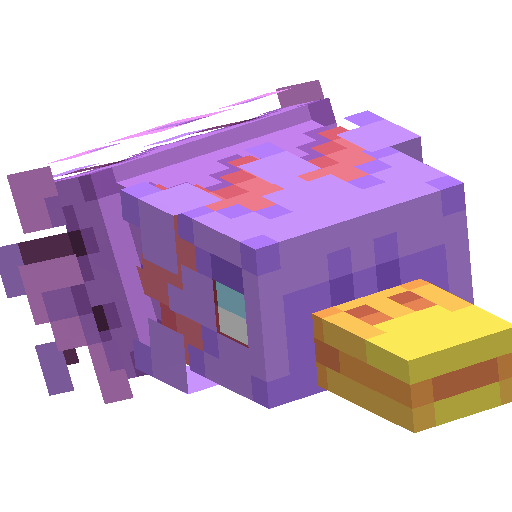
| |<center><div style="width: 150px">[[File:Stone Dragon Emperor.gif|link=Stone Dragon Emperor]]</div></center> [[Stone Dragon Emperor]] | | |{{AFix}}[[File:Stone Dragon Emperor.png|link=Stone Dragon Emperor]]{{AFixEnd}} [[Stone Dragon Emperor]] |
| |- | | |- |
| |<center><div style="width: 150px">[[File:Tail of Wisdom.gif|link=Tail of Wisdom]]</div></center> [[Tail of Wisdom]] | | |{{AFix}}[[File:Tail of Wisdom.png|link=Tail of Wisdom]]{{AFixEnd}} [[Tail of Wisdom]] |
| |<center><div style="width: 150px">[[File:Hive Fist.gif|link=Hive Fist]]</div></center> [[Hive Fist]] | | |{{AFix}}[[File:Hive Fist.png|link=Hive Fist]]{{AFixEnd}} [[Hive Fist]] |
| |<center><div style="width: 150px">[[File:Beetleface.gif|link=Beetleface]]</div></center> [[Beetleface]] | | |{{AFix}}[[File:Beetleface.png|link=Beetleface]]{{AFixEnd}} [[Beetleface]] |
| |<center><div style="width: 150px">[[File:Beehive.gif|link=Beehive]]</div></center> [[Beehive]] | | |{{AFix}}[[File:Beehive.png|link=Beehive]]{{AFixEnd}} [[Beehive]] |
| |style="display: none"| | | |style="display: none"| |
| |- | | |- |
| Line 444: |
Line 442: |
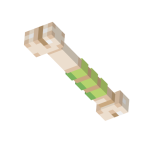
| |[[File:Bone Spear.png|150px|link=Bone Spear]] <br /> [[Bone Spear]] | | |[[File:Bone Spear.png|150px|link=Bone Spear]] <br /> [[Bone Spear]] |
| |[[File:Sabertooth Cap.png|150px|link=Sabertooth Cap]] <br /> [[Sabertooth Cap]] | | |[[File:Sabertooth Cap.png|150px|link=Sabertooth Cap]] <br /> [[Sabertooth Cap]] |
| |<center><div style="width: 150px">[[File:Jawbone Saw.gif|link=Jawbone Saw]]</div></center> [[Jawbone Saw]] | | |{{AFix}}[[File:Jawbone Saw.png|link=Jawbone Saw]]{{AFixEnd}} [[Jawbone Saw]] |
| |- | | |- |
| |<center><div style="width: 150px">[[File:Raptor Skull.gif|link=Raptor Skull]]</div></center> [[Raptor Skull]] | | |{{AFix}}[[File:Raptor Skull.png|link=Raptor Skull]]{{AFixEnd}} [[Raptor Skull]] |
| |} | | |} |
| </center> | | </center> |
| Line 455: |
Line 453: |
| <center> | | <center> |
| {|class="wikitable" | | {|class="wikitable" |
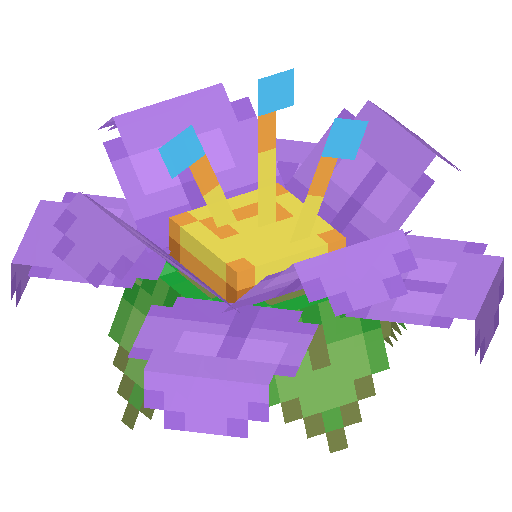
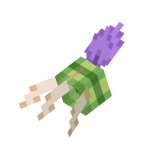
| |<div style="width: 150px; height: 150px">[[File:Munchflower Sprout.gif|link=Munchflower Sprout]]</div><br />[[Munchflower Sprout]] | | |{{AFix}}[[File:Munchflower Sprout.png|link=Munchflower Sprout]]{{AFixEnd}} [[Munchflower Sprout]] |
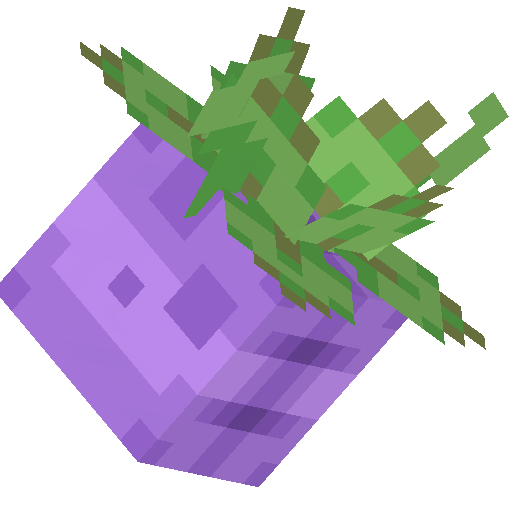
| |<div style="width: 150px; height: 150px">[[File:Munchflower Arm.gif|link=Munchflower Arm]]</div><br />[[Munchflower Arm]] | | |{{AFix}}[[File:Munchflower Arm.png|link=Munchflower Arm]]{{AFixEnd}} [[Munchflower Arm]] |
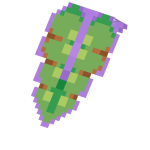
| |[[File:Munchflower Leaf.png|150px|link=Munchflower Leaf]] <br /> [[Munchflower Leaf]] | | |[[File:Munchflower Leaf.png|150px|link=Munchflower Leaf]] <br /> [[Munchflower Leaf]] |
| |} | | |} |
| Line 468: |
Line 466: |
| !colspan="6"|{{Rarity|Rare}} | | !colspan="6"|{{Rarity|Rare}} |
| |- | | |- |
| |<div style="width: 150px; height: 150px">[[File:Ancient Potion.gif|link=Ancient Potion]]</div><br /> [[Ancient Potion]] | | |{{AFix}}[[File:Ancient Potion.png|link=Ancient Potion]]{{AFixEnd}} [[Ancient Potion]] |
| |<div style="width: 150px; height: 150px">[[File:Potion Frenzy.gif|link=Potion Frenzy]]</div><br /> [[Potion Frenzy]] | | |{{AFix}}[[File:Potion Frenzy.png|link=Potion Frenzy]]{{AFixEnd}} [[Potion Frenzy]] |
| |[[File:Bone Club.png|150px|link=Bone Club]]<br /><br /> [[Bone Club]] | | |[[File:Bone Club.png|150px|link=Bone Club]] <br /> [[Bone Club]] |
| |[[File:Rock on Head.png|150px|link=Rock on Head]]<br /><br /> [[Rock on Head]] | | |[[File:Rock on Head.png|150px|link=Rock on Head]] <br /> [[Rock on Head]] |
| |[[File:Bone Claw.png|150px|link=Bone Claw]]<br /><br /> [[Bone Claw]] | | |[[File:Bone Claw.png|150px|link=Bone Claw]] <br /> [[Bone Claw]] |
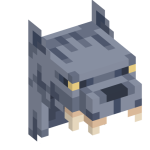
| |[[File:Direwolf Cap.png|150px|link=Direwolf Cap]]<br /><br /> [[Direwolf Cap]] | | |[[File:Direwolf Cap.png|150px|link=Direwolf Cap]] <br /> [[Direwolf Cap]] |
| |- | | |- |
| !colspan="6"|{{Rarity|Epic}} | | !colspan="6"|{{Rarity|Epic}} |
| |- | | |- |
| |[[File:Dart Bracer.png|150px|link=Dart Bracer]]<br /><br /> [[Dart Bracer]] | | |[[File:Dart Bracer.png|150px|link=Dart Bracer]] <br /> [[Dart Bracer]] |
| |<div style="width: 150px; height: 150px">[[File:Blowdart.gif|link=Blowdart]]</div><br /> [[Blowdart]] | | |{{AFix}}[[File:Blowdart.png|link=Blowdart]]{{AFixEnd}} [[Blowdart]] |
| |<div style="width: 150px; height: 150px">[[File:Feathery Arm.gif|link=Feathery Arm]]</div><br /> [[Feathery Arm]] | | |{{AFix}}[[File:Feathery Arm.png|link=Feathery Arm]]{{AFixEnd}} [[Feathery Arm]] |
| |<div style="width: 150px; height: 150px">[[File:Feathery Cap.gif|link=Feathery Cap]]</div><br /> [[Feathery Cap]] | | |{{AFix}}[[File:Feathery Cap.png|link=Feathery Cap]]{{AFixEnd}} [[Feathery Cap]] |
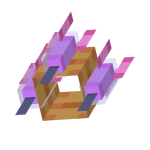
| |<div style="width: 150px; height: 150px">[[File:Skull Orb (Golden).gif|link=Skull Orb (Golden)]]</div><br /> [[Skull Orb (Golden)]] | | |{{AFix}}[[File:Skull Orb (Golden).png|link=Skull Orb (Golden)]]{{AFixEnd}} [[Skull Orb (Golden)]] |
| |<div style="width: 150px; height: 150px">[[File:Skull Crown (Golden).gif|link=Skull Crown (Golden)]]</div><br /> [[Skull Crown (Golden)]] | | |{{AFix}}[[File:Skull Crown (Golden).png|link=Skull Crown (Golden)]]{{AFixEnd}} [[Skull Crown (Golden)]] |
| |- | | |- |
| !colspan="6"|{{Rarity|Legendary}} | | !colspan="6"|{{Rarity|Legendary}} |
| |- | | |- |
| |style="border: none"| | | |style="border: none"| |
| |<div style="width: 150px; height: 150px">[[File:Volcano Torch.gif|link=Volcano Torch]]</div><br /> [[Volcano Torch]] | | |{{AFix}}[[File:Volcano Torch.png|link=Volcano Torch]]{{AFixEnd}} [[Volcano Torch]] |
| |<div style="width: 150px; height: 150px">[[File:Torch Head.gif|link=Torch Head]]</div><br /> [[Torch Head]] | | |{{AFix}}[[File:Torch Head.png|link=Torch Head]]{{AFixEnd}} [[Torch Head]] |
| |<div style="width: 150px; height: 150px">[[File:Skull Orb (Crystal).gif|link=Skull Orb (Crystal)]]</div><br /> [[Skull Orb (Crystal)]] | | |{{AFix}}[[File:Skull Orb (Crystal).png|link=Skull Orb (Crystal)]]{{AFixEnd}} [[Skull Orb (Crystal)]] |
| |<div style="width: 150px; height: 150px">[[File:Skull Crown (Crystal).gif|link=Skull Crown (Crystal)]]</div><br /> [[Skull Crown (Crystal)]] | | |{{AFix}}[[File:Skull Crown (Crystal).png|link=Skull Crown (Crystal)]]{{AFixEnd}} [[Skull Crown (Crystal)]] |
| |style="display: none"| | | |style="display: none"| |
| |} | | |} |
| </center> | | </center> |
| </tabber> | | </tabber> |


 Template:AFixEnd Voodoo Doll
 Template:AFixEnd Witch Doctor's Mask
 Template:AFixEnd Swarm Basket
 Template:AFixEnd Wheel of Destiny
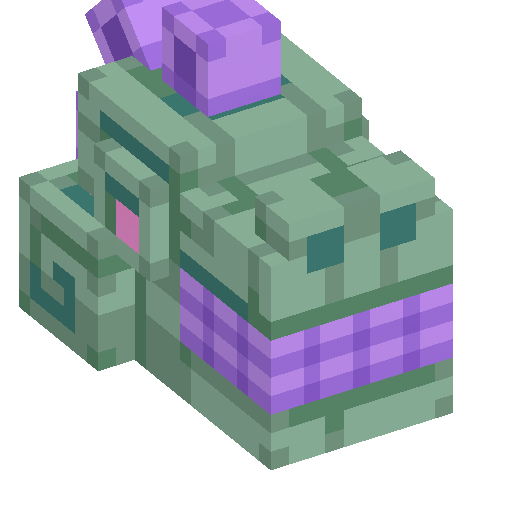 Template:AFixEnd Stone Dragon Emperor
 Template:AFixEnd Tail of Wisdom
 Template:AFixEnd Hive Fist
 Template:AFixEnd Beetleface
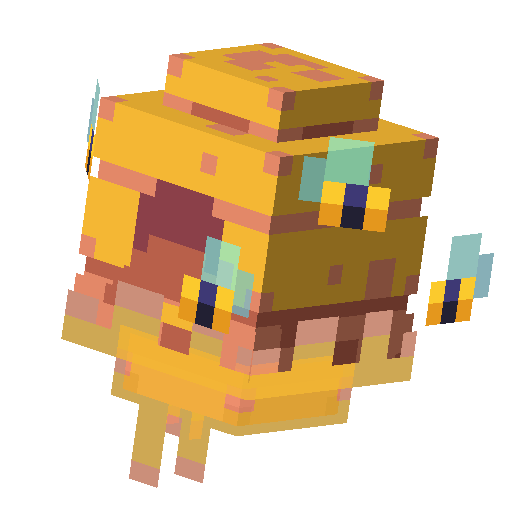 Template:AFixEnd Beehive


 Template:AFixEnd Jawbone Saw
 Template:AFixEnd Raptor Skull